

(Last Updated 3/25/22)
Currently PromoTix exclusively integrates with Stripe for credit card processing. In order to sell paid tickets on PromoTix, you will need to connect a Stripe account to each of your events. All revenue from ticket sales will be deposited directly into your Stripe account.
For the latest information on Stripe's platform, payout schedules, and associated fees, please visit their website here.
1. Click on the "Stripe payments" button
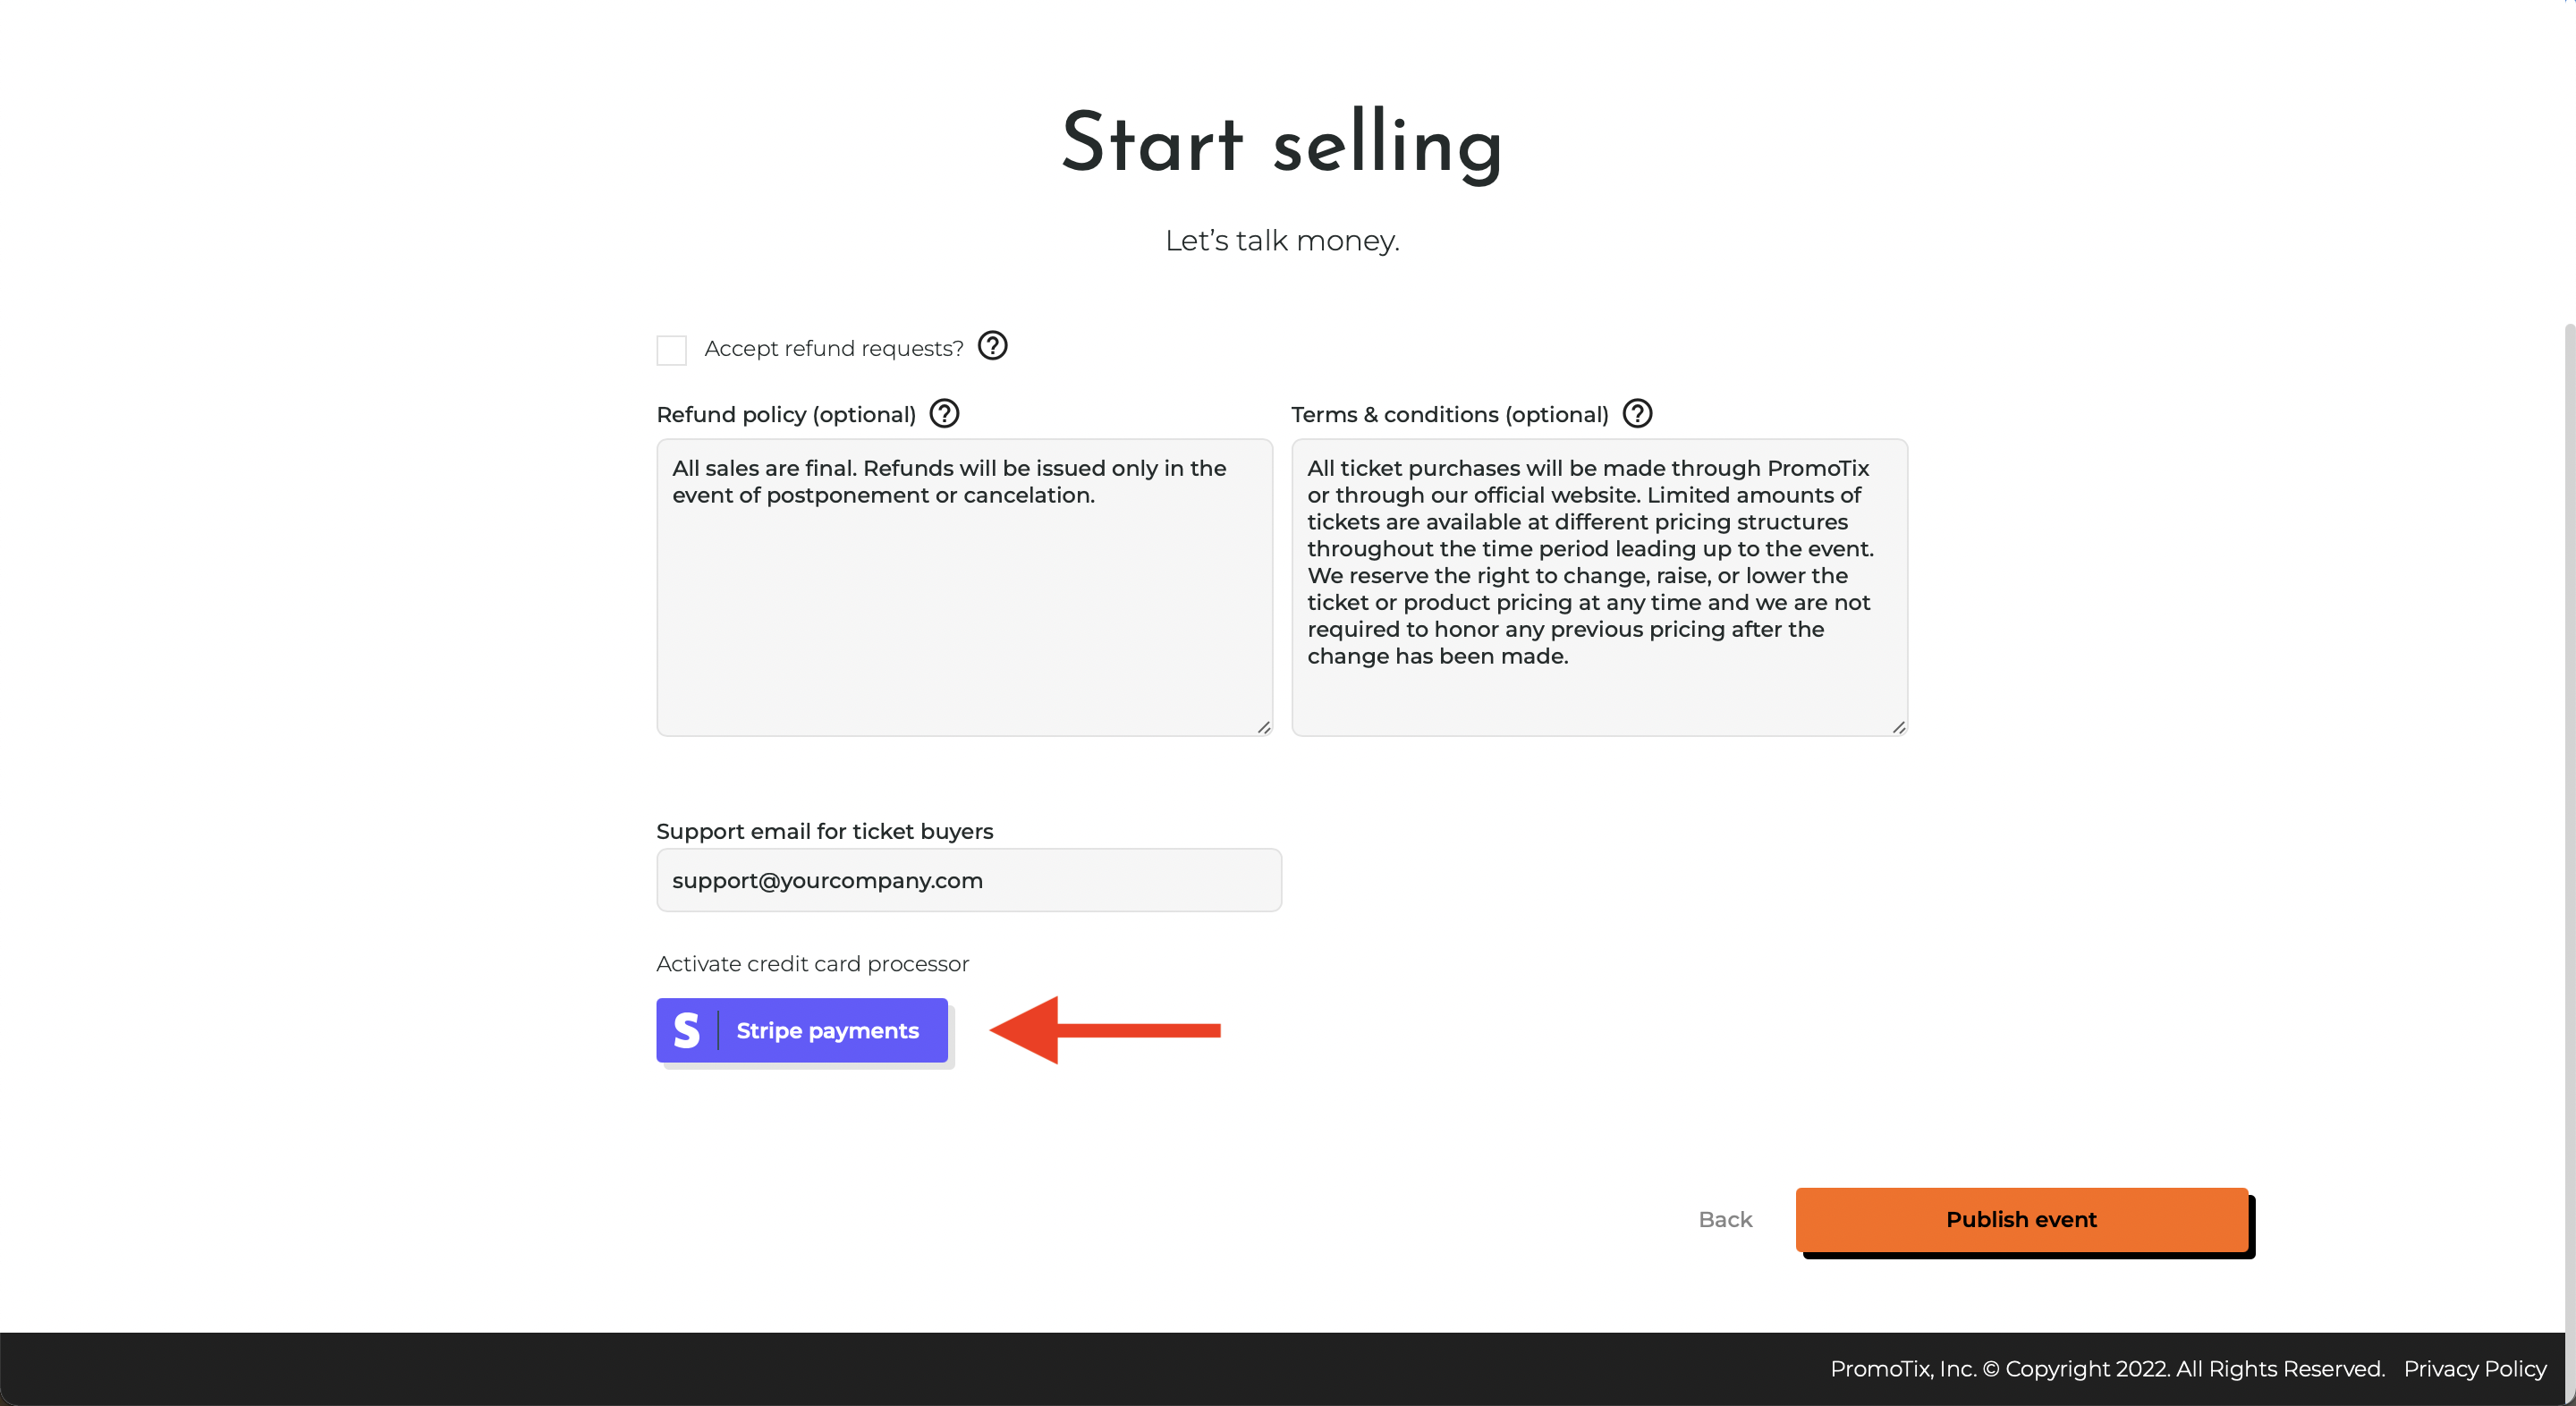 On the very last step when creating your PromoTix event, you will see a "Stripe payments" button. Click this button to create a new Stripe account, or connect an existing Stripe account to your PromoTix event.
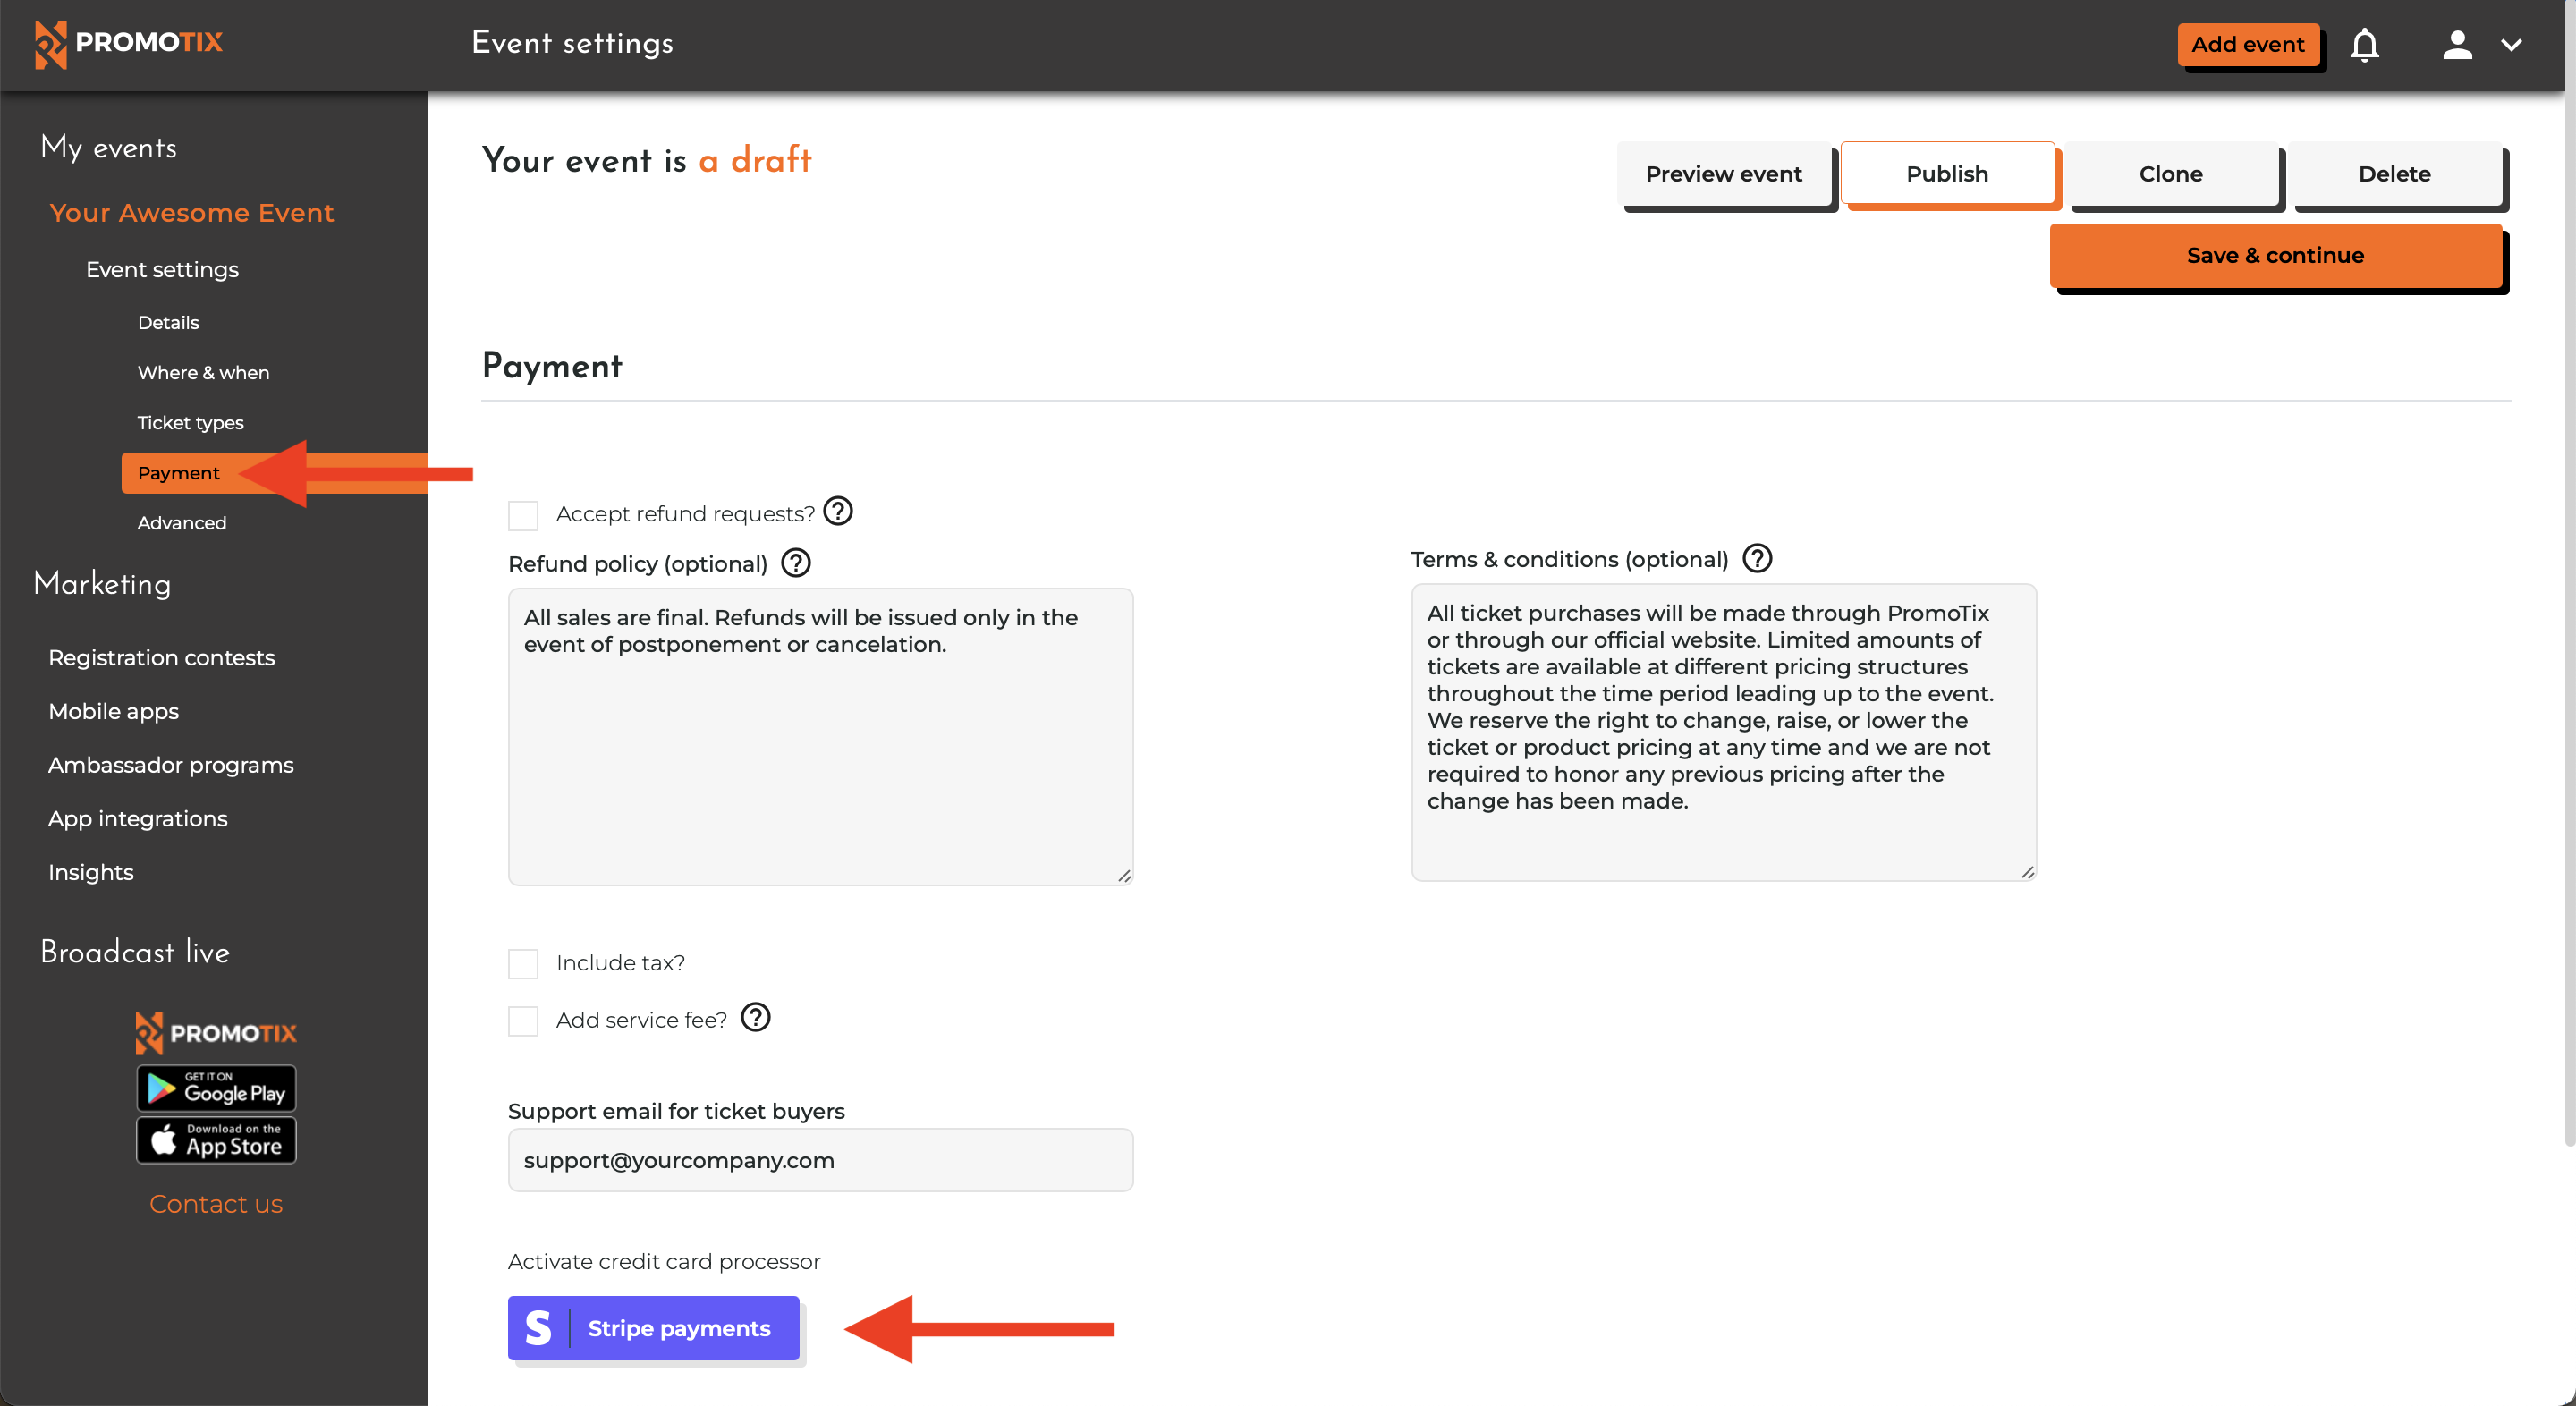
If you are editing an existing PromoTix event, you can find this button on the "Payment" tap in the drawer on the left side of the screen:
 2. Enter in your email address to get started
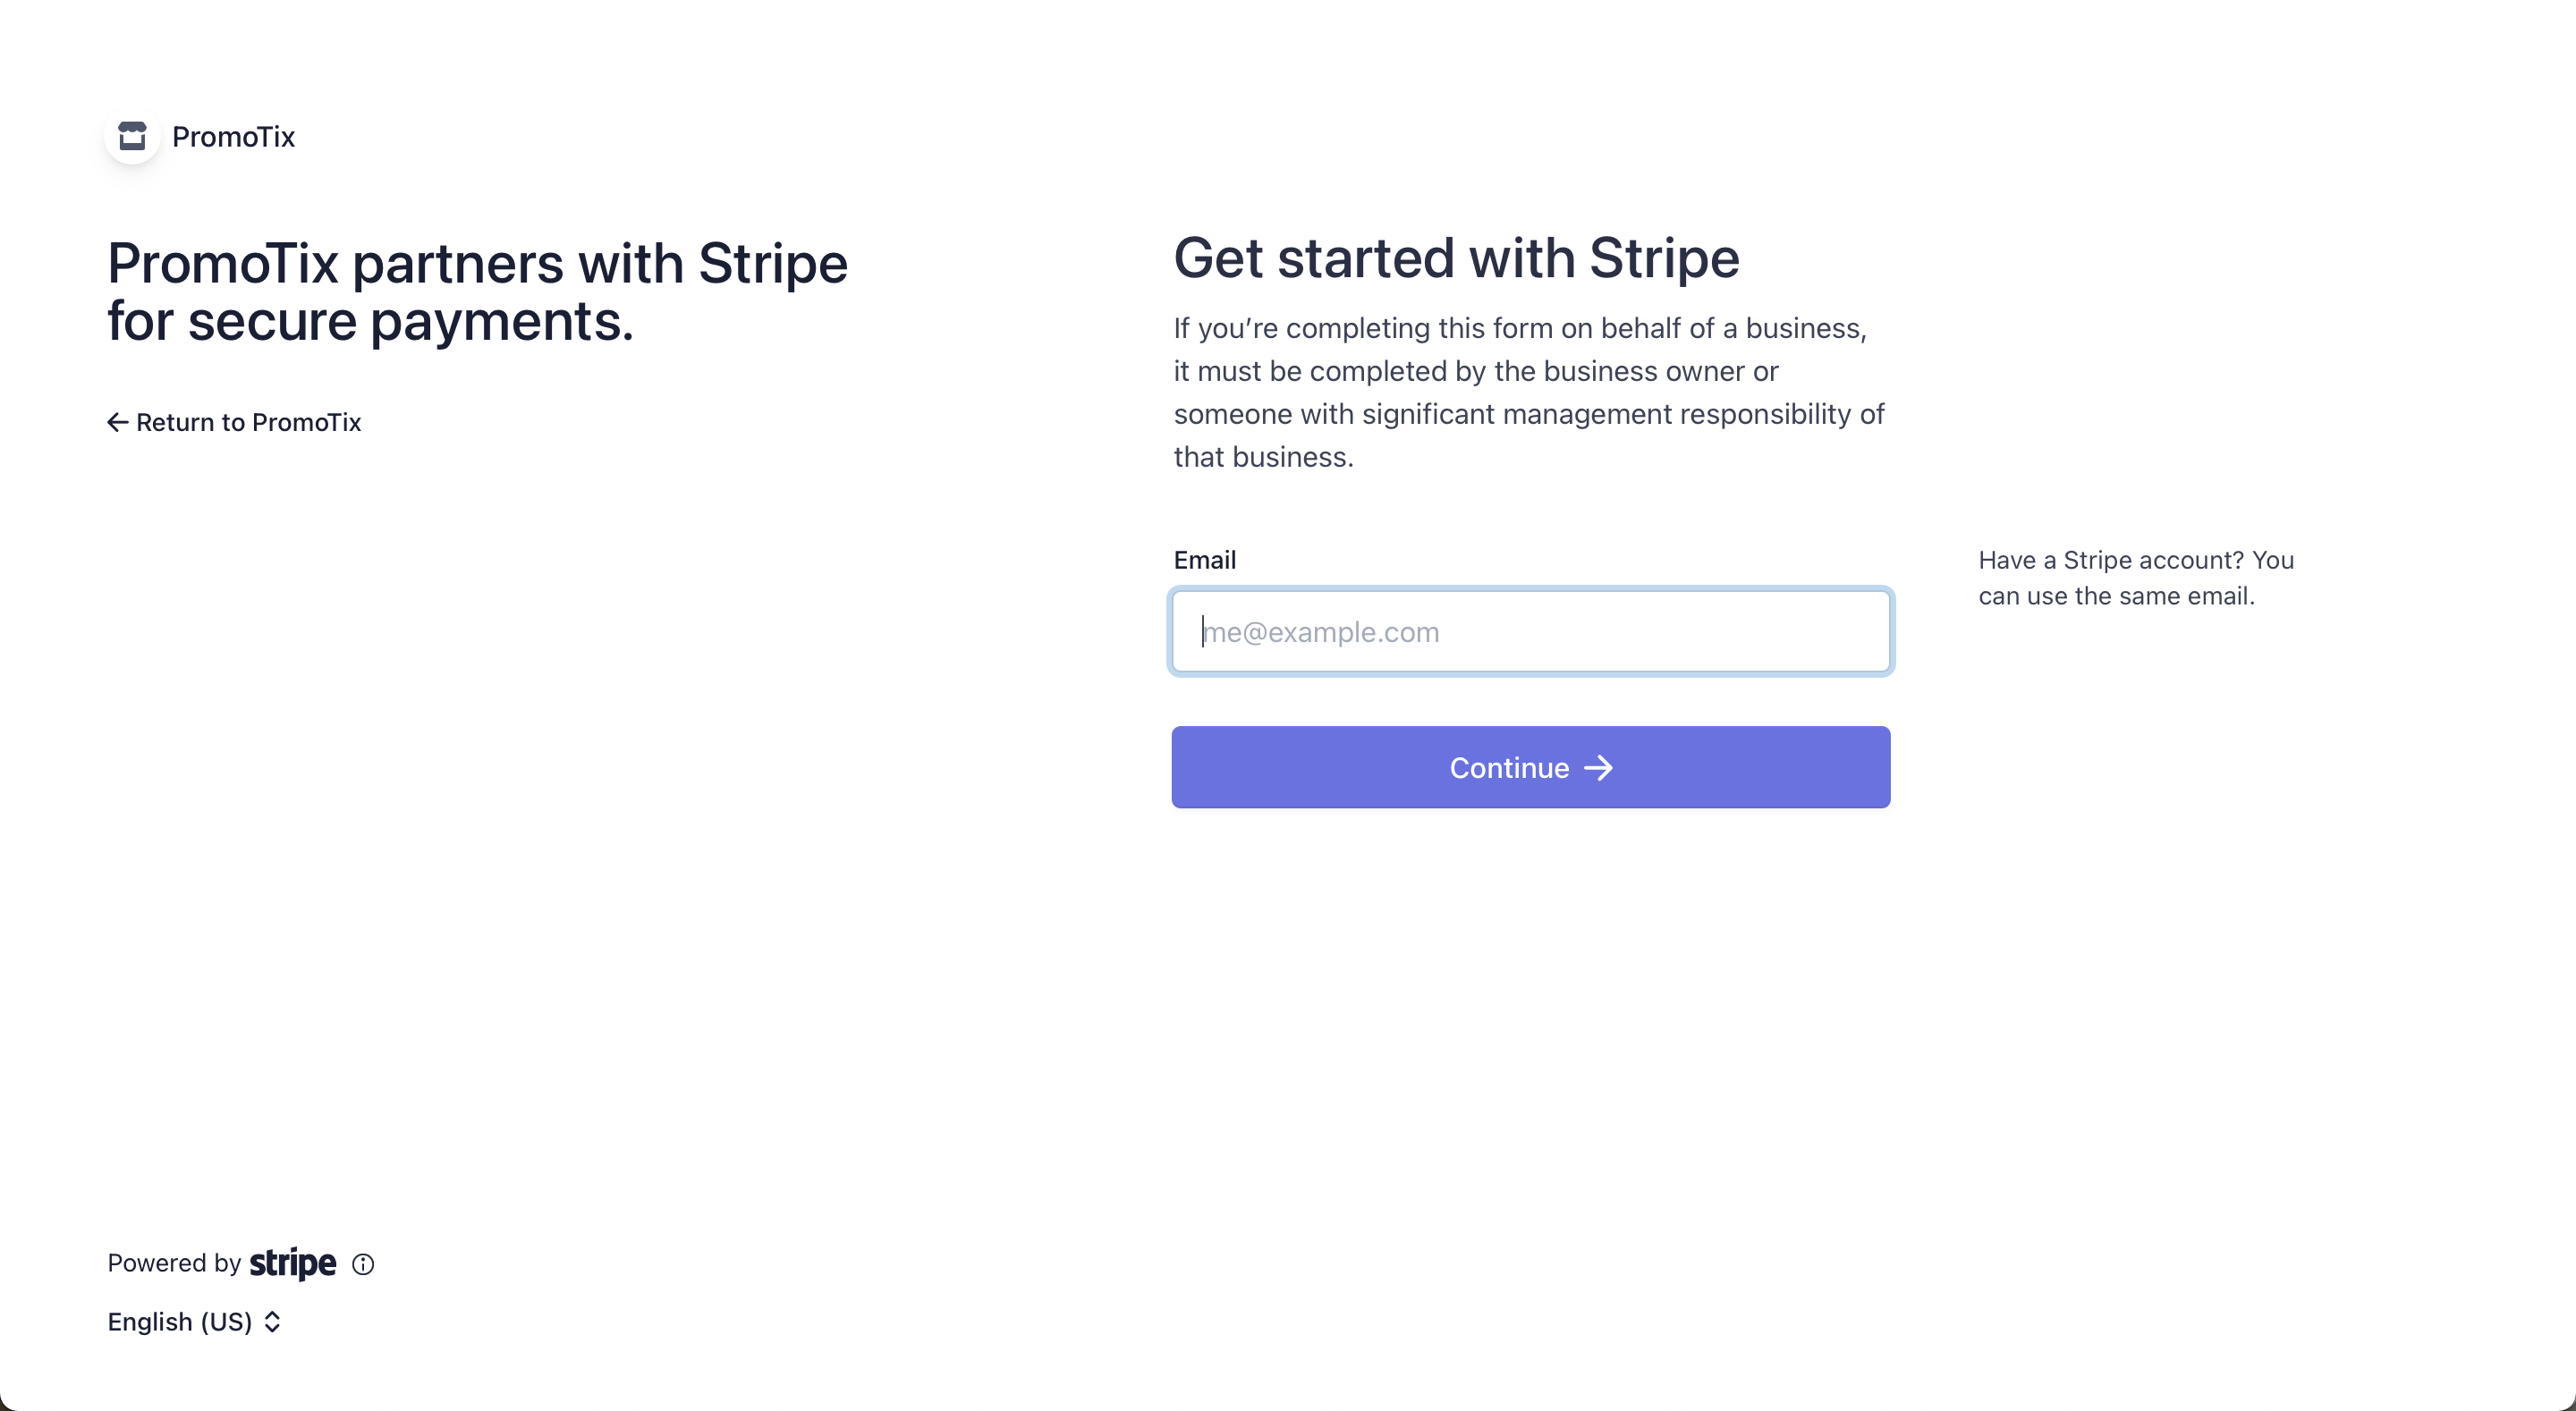 If you already have a Stripe account, enter in the email address associated with your account. After logging in, you will automatically be redirected back to PromoTix and your account will be successfully connected to your event.
If you need to create a Stripe account, you will automatically be guided through the account creation process. Once your account has been created and you have given authorization, you will automatically be redirected back to PromoTix and your account will be successfully connected to your event.
NOTE: when creating your Stripe account, please note that some of your public business information will be visible to your ticket buyers on their bank statements. For example, it is not advised to use your personal cell phone number as your public business phone number.
3. Verify your Stripe connection
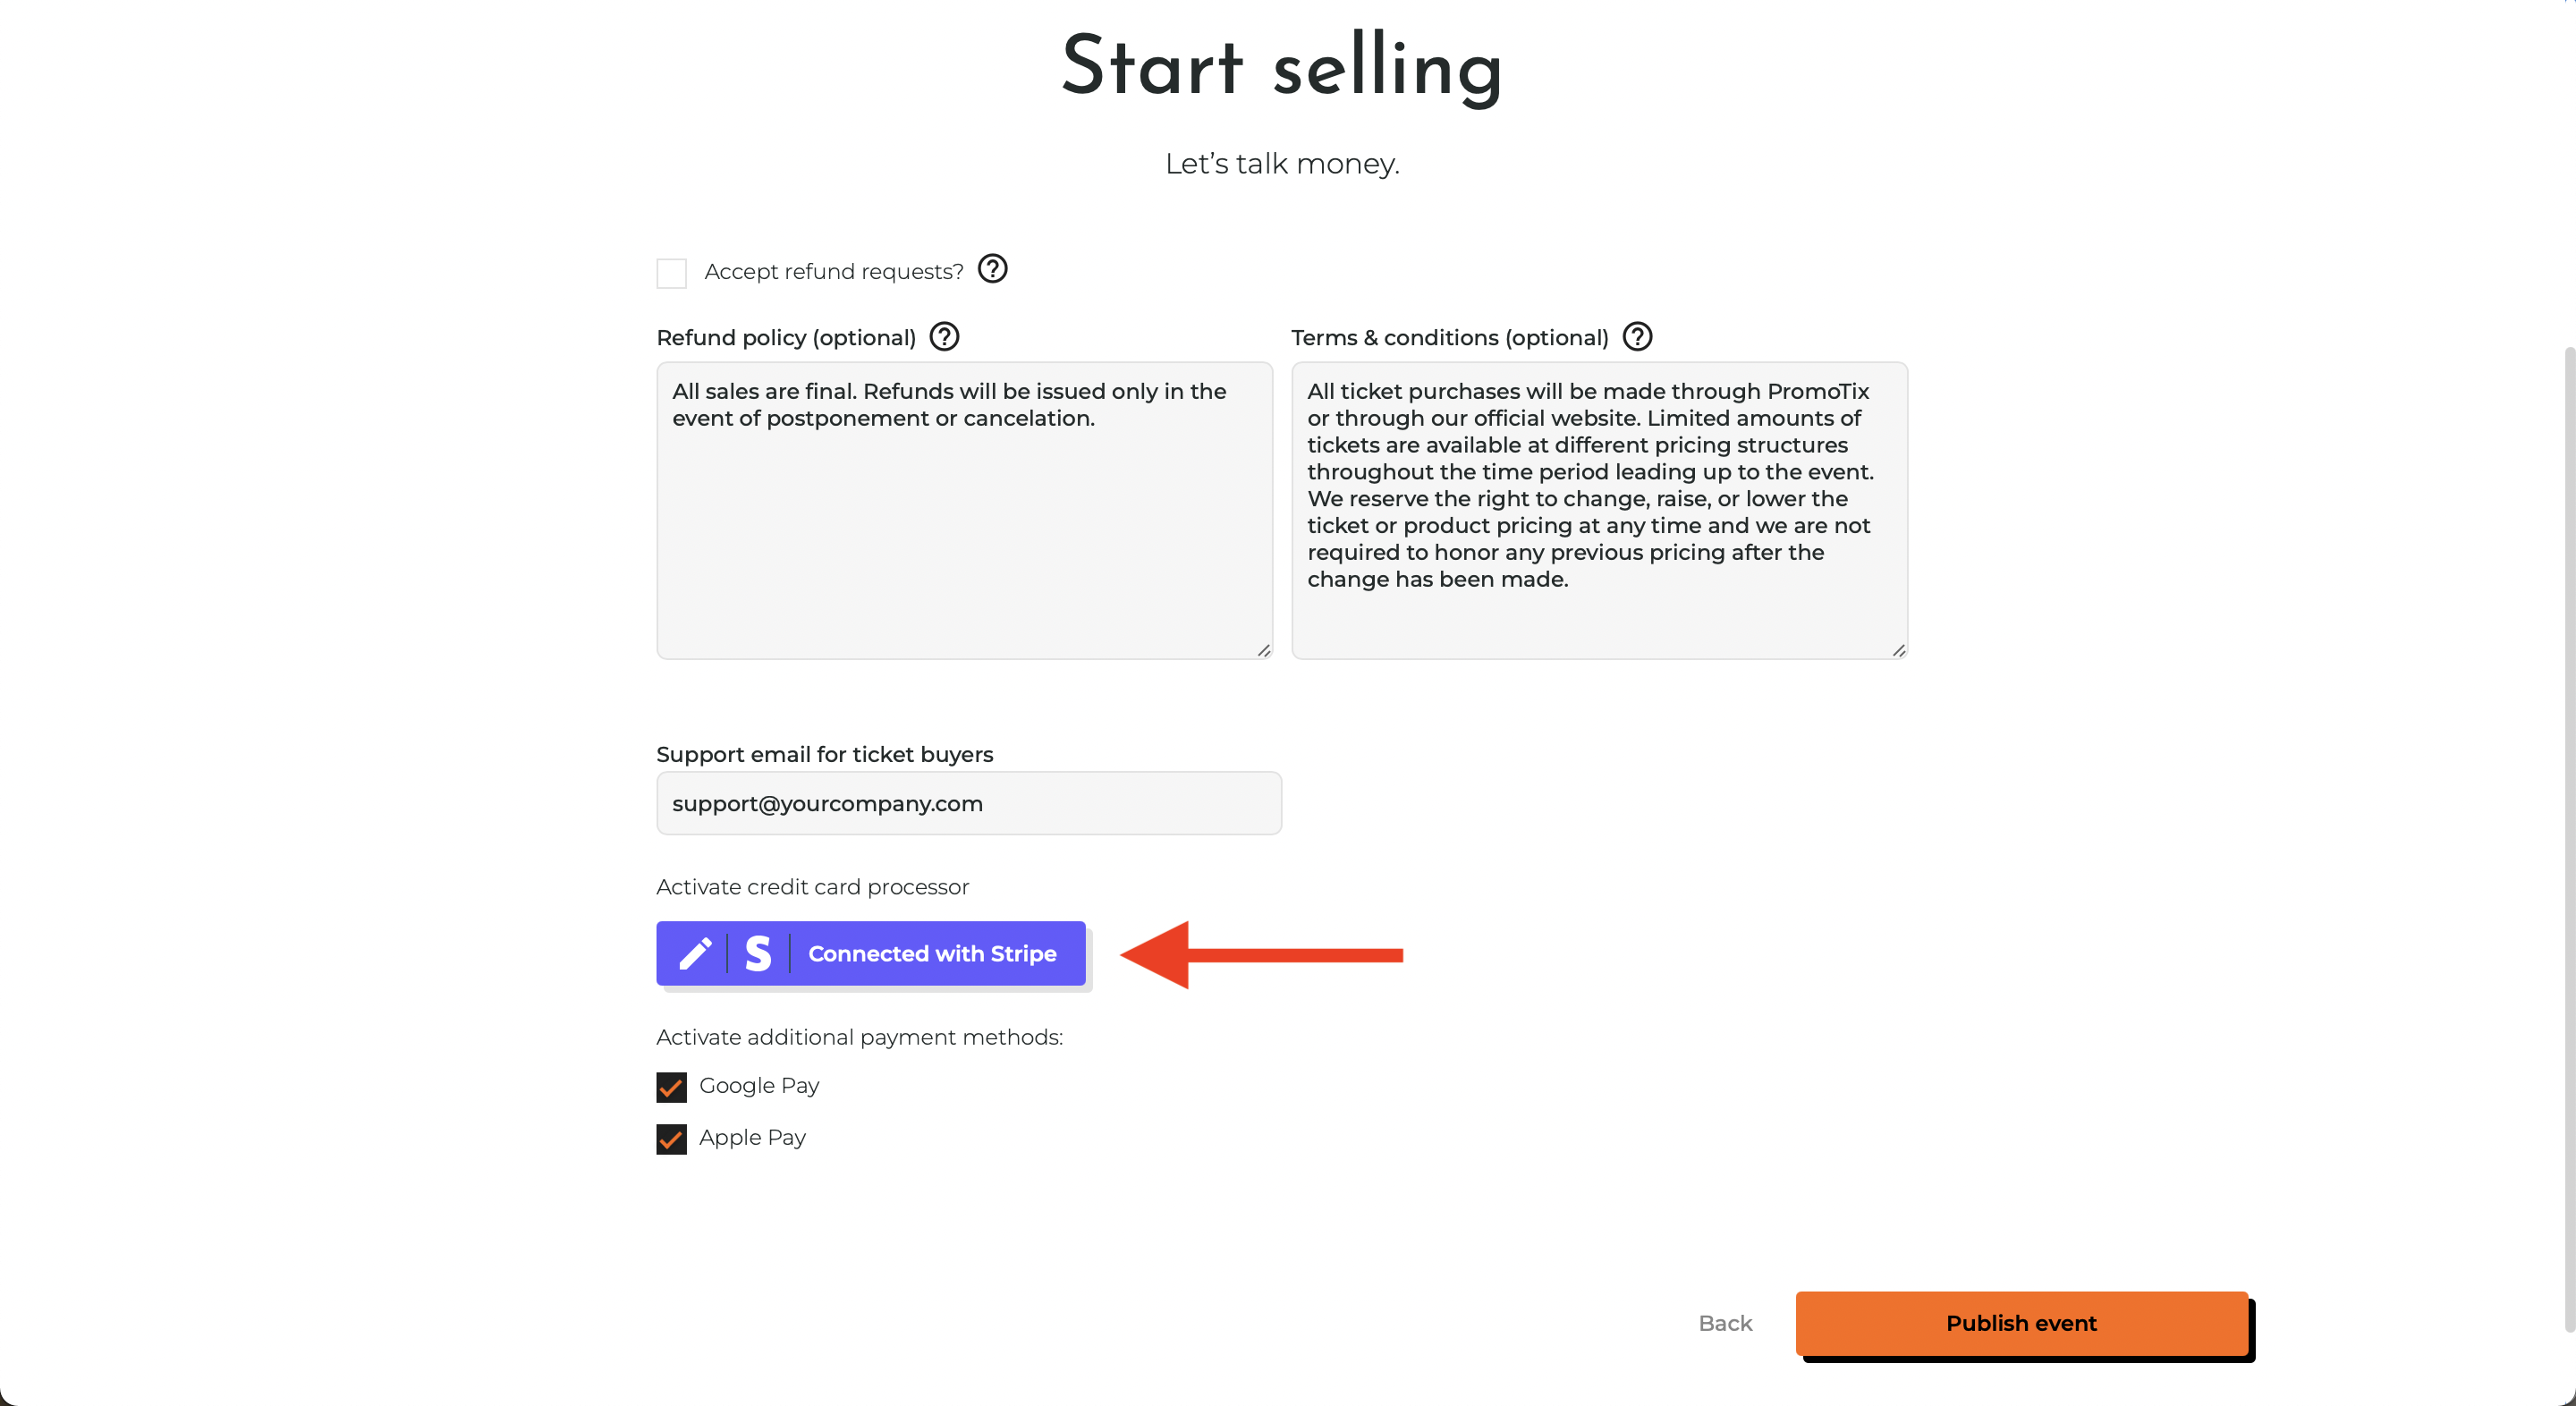 To verify that your Stripe account has been connected successfully, check to see if the "Stripe payments" button has been changed to "Connected with Stripe." If so, this means that your Stripe account has been successfully connected to your event. You are all set!
TIP: you can change the Stripe account connected to your events at any time by clicking on the small pencil icon.
TIP: to avoid having to reconnect your Stripe account every time you create a new event, clone a pre-existing event that already has your Stripe account connected.
Still Have Questions?

